Cowboy Rich Steak Marinade


Writer: Michelle R Dunlap


Affiliate Disclosure

Affiliate Disclosure – Designer Crafts by Michelle is a participant in the Amazon Services LLC Associates Program, an affiliate advertising program designed to provide a means for sites to earn advertising fees by advertising and linking to amazon.com. As Amazon Associate, we earn from qualifying purchases. These affiliate links do not increase the final prices of the actual product or services that you purchased. At Designer Crafts by Michelle, our editors only review products and services that are trustworthy and believe can bring benefit to you. Thus, we do not take extra compensation for product reviews. We greatly appreciate it when you choose to use our links to buy products and we aim to be upfront about the products we receive compensation for! From time to time we also publish advertorials (paid-for editorial content) and sponsored content on the site. When this is the case the content is clearly marked as sponsored or promoted.

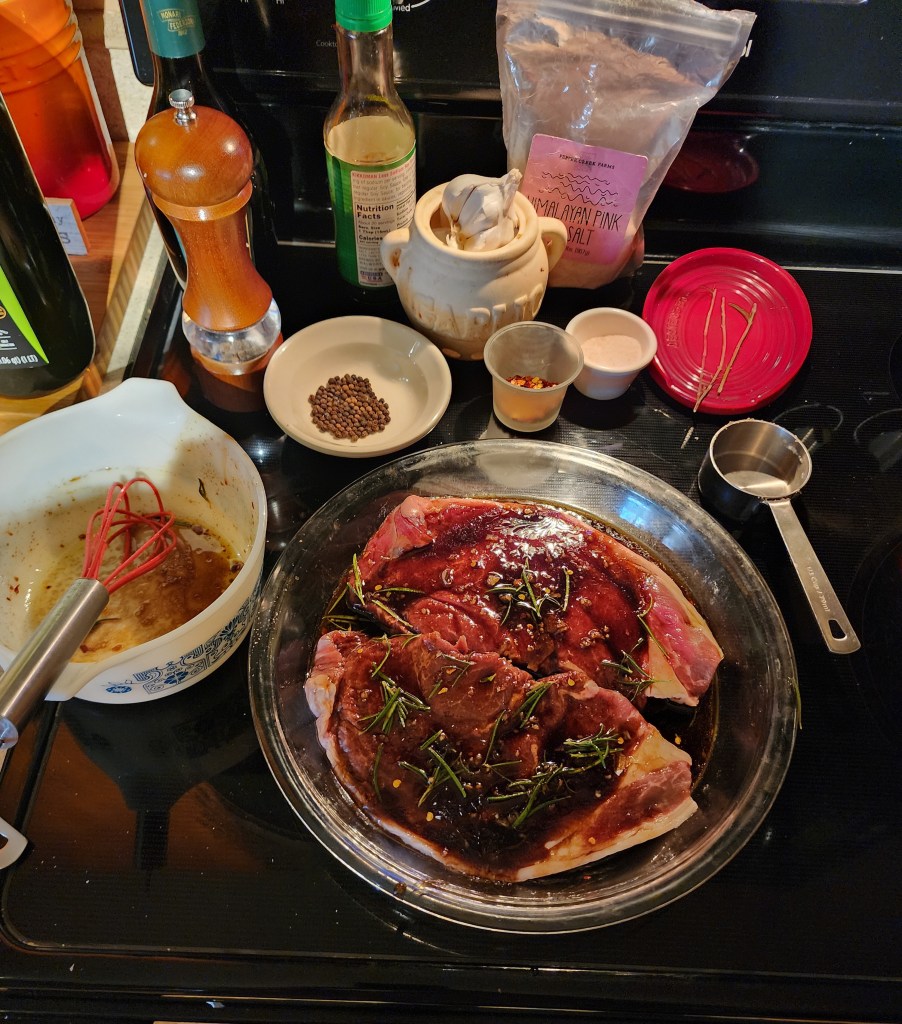
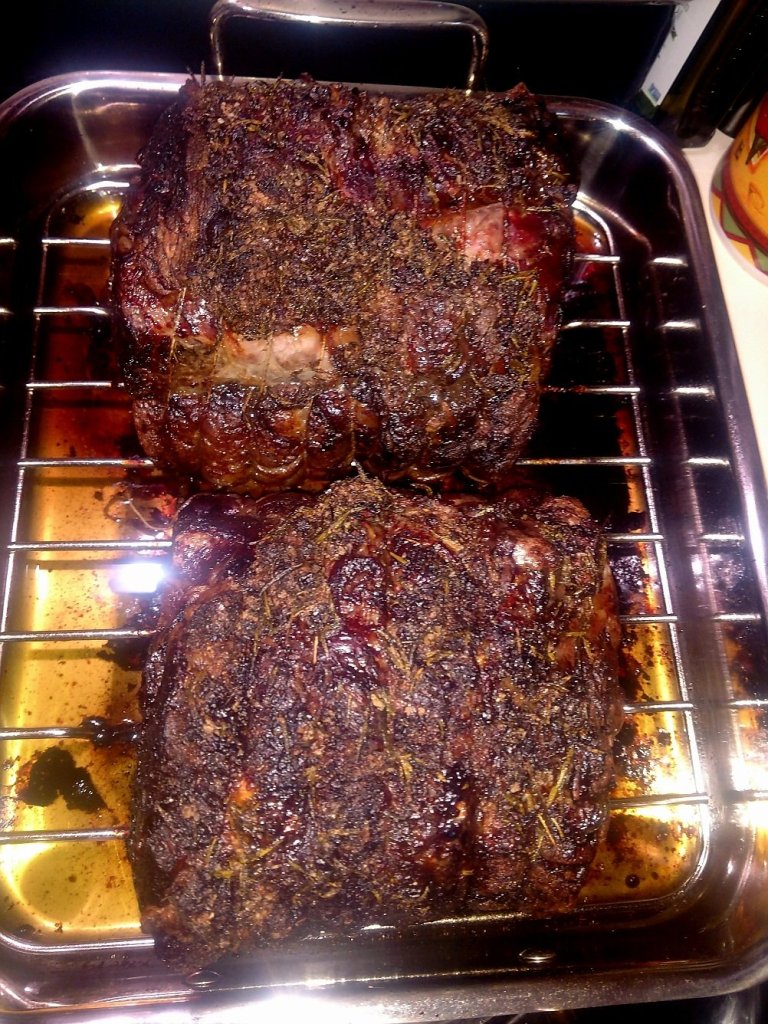
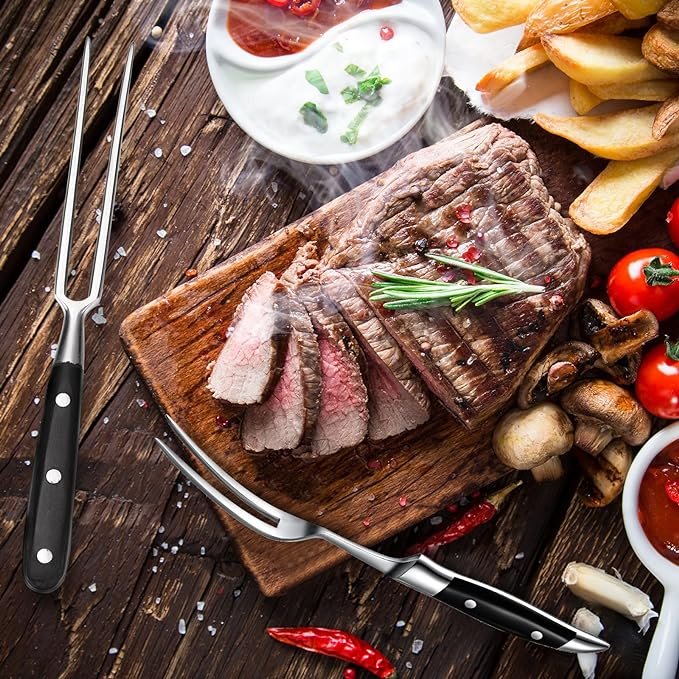
I named this recipe the “Cowboy Rich Marinade,” being that this steak marinade recipe has rich ingredients like aged Italian balsamic vinegar, soy sauce, and rosemary just to name a few. The depth of flavors in the marinade complements the beef flavor of the steak.

The list of ingredients you will need for this Recipe:

  • A couple of sirloin steaks
  • 1/2 cup balsamic vinegar
  • 2 tablespoons of low sodium soy sauce
  • 1/2 cup brown sugar
  • 1/4 cup olive oil
  • 2 sprigs of rosemary
  • 1 tablespoon of minced garlic
  • 1 teaspoon of red pepper flakes
  • 1/4 teaspoon himalayan salt (optional)

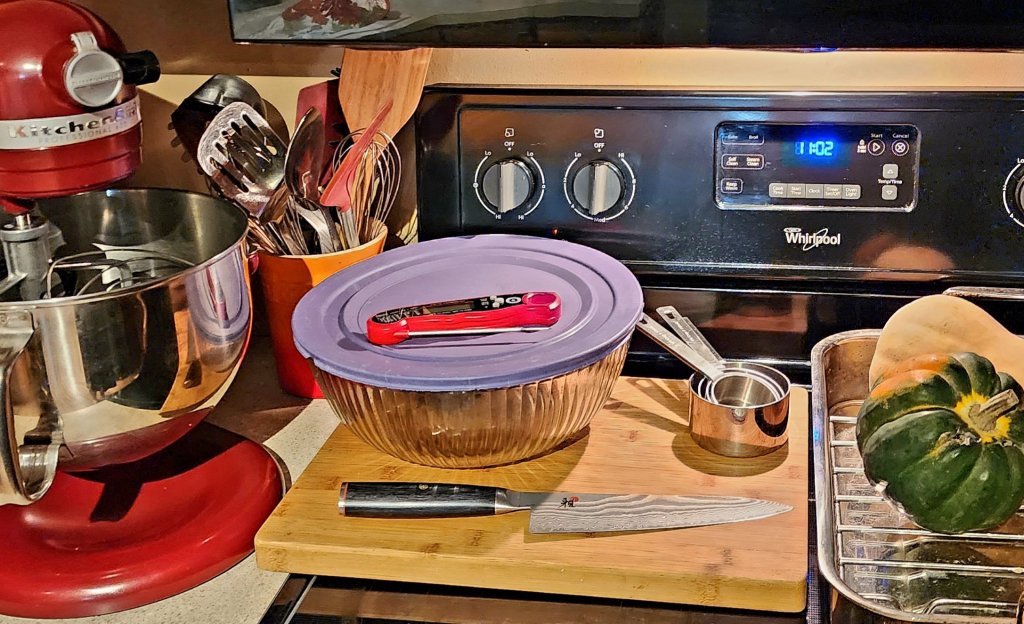
Get out a small bowl, small wish, measuring cups and spoons, garlic press, a deep glass dish to fit steaks, and the rest of the ingredients you will need to get started.

Directions:

Take your steaks with a paper towel and pat them dry in the glass dish, set aside. Now, using the small bowl, add the balsamic vinegar, light soy sauce, brown sugar, olive oil, and rosemary by peeling leaves back off the stem into the bowl. Whisk till just mixed.

Grab 2 – 3 garlic cloves and with the garlic press add minced garlic in a bowl with a few red pepper flakes for kicking the sweet. Whisk all ingredients again till flavors combined well. You can taste the marinade to see if it needs additional salt. Himalayan seems to be a nice light touch. Poor over steak and marinade for 4 to 6 hours.

Take the steaks out of the fridge to let them warm up to room temperature, about 30 minutes. Now grab a large cast iron skillet to seal all this good flavor in.

Preheat the cast iron skillet on medium heat….

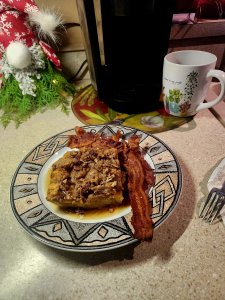
Add a table of olive oil and a tablespoon of butter to the pan. Take steak out of the marinade, letting excess drip off. I decided to cut these big steaks into four, but it’s up to you. You add steaks to pan and cook watching they don’t burn. Turn steaks when you see a dark crust sear. Cook the other side till your steak is done to your liking. I just served noodles and broccoli with the steaks. Any sides would work. You could even chunk steaks in cubes and serve over rice with vegetables for a healthy dinner. I hope you enjoy this recipe. If you have any questions, please feel free to comment

If you are interested in my kitchen items for this recipe, I highly recommend these items I bought through amazon. Here is my affiliate link to these items. I had my cast iron skillet for 15 years. It will last a lifetime.

Overnight Pumpkin Pecan French Toast


Writer: Michelle R Dunlap


Affiliate disclosure

Affiliate Disclosure – Designer Crafts by Michelle is a participant in the Amazon Services LLC Associates Program, an affiliate advertising program designed to provide a means for sites to earn advertising fees by advertising and linking to amazon.com. As Amazon Associate, we earn from qualifying purchases. These affiliate links do not increase the final prices of the actual product or services that you purchased. At Designer Crafts by Michelle, our editors only review products and services that are trustworthy and believe can bring benefit to you. Thus, we do not take extra compensation for product reviews. We greatly appreciate it when you choose to use our links to buy products and we aim to be upfront about the products we receive compensation for! From time to time we also publish advertorials (paid-for editorial content) and sponsored content on the site. When this is the case the content is clearly marked as sponsored or promoted.

After a long, busy week, we look forward to sleeping in, but we still desire breakfast when we wake up. This recipe is perfect to make to the night before then wake up the next day just to put breakfast in the oven. Now you can enjoy your cup of coffee with the family instead of stuck in the kitchen.

The french bread mixed with pumpkin spice and egg cream that’s so decadent and rich. The French bread soaks up all those flavors overnight and gets baked into a fluffy sweet taste with a crunchy pecan topping. It makes a for a special breakfast anytime.

To get started, I bought a 1 pound loaf of French bread and sliced and diced into cubes, then placed in butter greased 9 x 13 glass dish.

Now, let’s grab a glass mixing bowl and the rest of the ingredients for recipe:

  • 2 cups milk (any %)
  • 1/2 cup heavy cream (I used eggnog)
  • 1 cup white sugar
  • 1 cup pumpkin puree
  • 6 large eggs
  • 2 tablespoons of pure vanilla extract (I used Madagascar bean paste)
  • 1 1/2 teaspoons of cinnamon
  • 1/2 teaspoon of ground ginger
  • 1/4 ground nutmeg (I use fresh ground)
  • 1/8 teaspoon of ground cloves

Once all added to the glass mixing bowl, whisk together till eggs are completely mixed in. Now pour over bread in casserole dish. Cover with plastic wrap, place in fridge overnight.

Good morning has arrived, and it’s time to preheat to oven to 350 degrees. Now, get out a small bowl and gather the ingredients for the crumb topping on the casserole.

While the oven is preheating, it’s time to make the Pecan Crumb Topping Recipe:

  • 1/2 cup flour
  • 1/2 cup brown sugar
  • 1/2 cup of butter, cut into small pieces
  • 1/2 ground cinnamon
  • 3/4 cup chopped pecans

Find a small bowl and add all the ingredients above (except the pecans) for the crumb topping. Cut and mash with a fork until the mixture resembles course crumbs. Sprinkle mixture over casserole then place in oven.

Bake at 350 degrees for 35 – 40 minutes. Middle should come out clean with knife. I serve it with a little syrup on top. Enjoy with some coffee, or maybe a side of bacon, too. Great dish for the holidays!

I have some trusted kitchen items I use in this recipe. I especially love my handy nutmeg grinder. I use it daily in my coffee. I had been shopping through Amazon for years, and now I am a proud amazon affiliate, so if you are interested in the product, hit the link on the picture. If you have any questions, please comment below. Thank you.

Kitchen K-Cup Christmas Tree


Writer: Michelle R Dunlap


Affiliate Disclosure

Affiliate Disclosure – Designer Crafts by Michelle is a participant in the Amazon Services LLC Associates Program, an affiliate advertising program designed to provide a means for sites to earn advertising fees by advertising and linking to amazon.com. As Amazon Associate, we earn from qualifying purchases. These affiliate links do not increase the final prices of the actual product or services that you purchased. At Designer Crafts by Michelle, our editors only review products and services that are trustworthy and believe can bring benefit to you. Thus, we do not take extra compensation for product reviews. We greatly appreciate it when you choose to use our links to buy products and we aim to be upfront about the products we receive compensation for! From time to time we also publish advertorials (paid-for editorial content) and sponsored content on the site. When this is the case the content is clearly marked as sponsored or promoted.

We always look forward to those little holiday traditions inside the home that make the season extra special. I looked forward to the tradition of having my favorite coffee around for the holidays. You know, it’s not the holidays without having pumpkin spice or peppermint mocha coffee.

Of course, I have my regular coffee pot on one counter, but I also have my Keurig coffee maker at the other counter. I love the taste of all the specialty flavors you can find in the k-cups these days. The holidays are the perfect time to set up a special K-cup coffee station that everyone will love and look forward to the tradition each year.

Here’s a small video to get the whole special K-cup Christmas tree feel….

I am a huge fan of christmas decorations, so I usually have 3 christmas trees I decorate every year in my home. But of course, seeing the idea of putting coffee pods in a christmas tree all lit up was ideal for me! Picking a k-cup flavor from a countertop christmas tree is such a cool way to serve yourself and offer to guests.

It’s Christmas morning all month long, picking a coffee present from a tree.

I couldn’t wait to order my stuff on Amazon for my coffee k-cup christmas tree. I bought the mini tree, 100 mini white lights, Crazy Coffee Cups 20pk, small packs of ribbon, ornament hooks and kitchen oven-mit gnome (didn’t need this, but you know)for my coffee Keurig station for the holidays.

My order came fast, and as you can see, there are a lot of tasty coffee flavors in these Crazy K-Cups. My daughter displayed them into a tree for me. I had to try one, and they work just fine in my Keurig coffee maker. So I was good to go on my countertop christmas coffee tree project.

The first thing that I did was getting the lights strung around the tree, and since I had spare beads around, I put those on too. It gave the tree an extra pop. Now I get to have the fun in making the k-cup ornaments.

I started by tying the ribbon around the k-cup, then twice to knot it, I cut the ribbon. Take an ordement hook through the loop of the ribbon knot, then squeeze the hook to ribbon. Now, you can secure the hook with the k-cup to the tree. Continue until all the k-cups are on the tree.

This method works well. The k-cup sits in ribbon great but still pulls out easily for your flavor of choice with the tree safe and steady.

Once all my k-cups were placed in the tree, I couldn’t wait to plug it in. Be careful, I recommend keeping the k-cup tree on the other side of Keurig water refill side. Also, I kept the plug in a little sleigh off the counter to be extra safe of any kitchen water hazards (a cup would work, too).

It’s definitely worth the time to set this coffee display up. This only took me 30 minutes myself. The mini k-cup christmas tree on the counter lights up the whole kitchen. It looks so warm and welcoming. Especially paired up with a Overnight Pumpkin Pecan French toast in the morning. If you’re interested in the french toast recipe, hit this link

https://designercrafts.business.blog/2023/11/25/overnight-pumpkin-pecan-french-toast/

I highly recommend this fast, inexpensive project for the holidays. A great family tradition in my home each year. If you’re interested in buying these items, here is my quick affiliate link to each one I bought and recommend to you. Happy Holidays

Decorate A Teenage Bedroom Bohemian Style


Writer: Michelle R Dunlap


Affiliate Disclosure

Affiliate Disclosure – Designer Crafts by Michelle is a participant in the Amazon Services LLC Associates Program, an affiliate advertising program designed to provide a means for sites to earn advertising fees by advertising and linking to amazon.com. As Amazon Associate, we earn from qualifying purchases. These affiliate links do not increase the final prices of the actual product or services that you purchased. At Designer Crafts by Michelle, our editors only review products and services that are trustworthy and believe can bring benefit to you. Thus, we do not take extra compensation for product reviews. We greatly appreciate it when you choose to use our links to buy products and we aim to be upfront about the products we receive compensation for! From time to time we also publish advertorials (paid-for editorial content) and sponsored content on the site. When this is the case the content is clearly marked as sponsored or promoted.

We were all teenagers once, the bedroom was the only space in the house we could get away from it all. Now, as a parent myself, I know how important it is to have their bedroom be a personal space they can feel good about after a long day of school.

Bohemian style was exactly what my teenage daughter needed with the calming natural colors, textures, and fairy lights to lighten the mood.

I started off with painting the ceiling in her bedroom in a charcoal black chalk paint. This contrast from the Macrame ceiling tapestry really pop against the soft black color. I installed four ceiling hooks so the tapestry would hang a few inches down off the ceiling for depth.

I accentuated the ceiling tapestry with plug-in mini fairy lights that I weaved through the Macrame. I then draped the light down into the gray sheer panel, which imitates a canopy over the bed.

Just underneath the canopy on the wall, I found this rustic elephant decor for that spot to hang. My daughter is a fan of elephants, plus it looked bohemian style, which was a win for mom. The arch above, I thought it gave the canopy area more dimension at the top.

I found the perfect Bohemian style comforter when I redecorated this bedroom this past spring, but the store has since changed the print a little. But I believe this comforter set has 5 or more bohemian styles to choose from. Some with elephants now, figures.

I had the bed area is done, now I had to hang a dream catcher to set the look over the bed. A few dream catchers, better safe than sorry.

On to the next decor item, this cute woven hanging shelf. The natural wood bottom with the macrame gives the space a calming feel. Of course, it’s the perfect place for a lit lantern.

I like a room to have function, so with my daughter having too many hats to hang,, I needed hooks of some kind. When I was searching for hooks on Amazon, I found these. They scream bohemian style to me.

My teenage daughter has jewelry all over the room and needed something to help organize all of it but still have it handy. When I searched on Amazon, I found this birdcage jewelry organizer in black that would accent the room and hold everything. I definitely recommend this item. It’s working out great.

The room came along nicely with all her grey colors with black & white accents. Her nightstand and a few other things in the room are refinished pieces. Redoing my daughter’s room kept me in a budget of around $150. I was impressed, these items are well made.

Except for this bedframe, it was extra. Just over a 100$ which was cheap. If you’re tired of a rickety bed frame, I found this heavy-duty twin wood metal frame that was very easy to put together and has held up perfectly with enough room for storage underneath.

This three color toned Bohemian Style bedroom theme can work for most teenagers. This decor is also great as gifts for the holiday then bringin the new year with a new room! I hope this article gave you some ideas for your own personal touches. Some of the products I bought through amazon in the pictures below I highly recommend. * I am Amazon affiliate associate with my personal links but I only recommend the products I have in my home or that has used personally. Thank you

One BIG Danish

Writer: Michelle R Dunlap


Affiliate Disclosure

Affiliate Disclosure – Designer Crafts by Michelle is a participant in the Amazon Services LLC Associates Program, an affiliate advertising program designed to provide a means for sites to earn advertising fees by advertising and linking to amazon.com. As Amazon Associate, we earn from qualifying purchases. These affiliate links do not increase the final prices of the actual product or services that you purchased. At Designer Crafts by Michelle, our editors only review products and services that are trustworthy and believe can bring benefit to you. Thus, we do not take extra compensation for product reviews. We greatly appreciate it when you choose to use our links to buy products and we aim to be upfront about the products we receive compensation for! From time to time we also publish advertorials (paid-for editorial content) and sponsored content on the site. When this is the case the content is clearly marked as sponsored or promoted.

With just a few ingredients and a few minutes, you can have a dessert for a crowd that looks professional. Even though store bought pastry saves time, I didn’t want to spend the time making individual servings. When I looked at the puff pastry, I thought, why can’t I make One Big Danish, then I could just serve into slices. It worked out beautifully, and need to share this easy danish recipe with you..

All you need at the store is these few simple ingredients:

  • Puff Pastry -1 pkg (refrigerated section)
  • Cream Cheese – 1 block
  • Berry of choice
  • White sugar
  • Power sugar
  • Pure almond extract
  • Pure vanilla extract
  • egg

TipIf you want to keep it really easy, you can just use one extract flavor and with the powdered sugar you can use in place of the white sugar to sweeten the cream cheese. I’m lucky my husband is a big fan of almond extract, we always seem to have plenty in the cabinet.

To get a better idea of the recipe, here’s a link to a little video clip on making the ” ONE Big Danish.” https://pin.it/6SdTQrz

A few other things that made this recipe easier is using this 3 piece sheet pan set. This One BIG Danish cooks beautifully on the silicone mat, then I can slide it right to the cooling rack. I’ve had mine for a few years now, and it still looks new. Plus, the Frozen movie theme silmat is so pretty, and bonus, I love the movie too! Now i’m gonna have to watch it again with the holidays coming.

Let me get you started on the list of items in my kitchen that helped make this recipe a little easier for me:

  • Cookie sheet pan
  • silicone mat
  • cooling rack
  • Fork, pastry bush
  • 2 small bowls
  • measuring cups and spoons
  • pastry spatula

I bought these kitchen items a few years ago through Amazon, which I highly recommend pictured below. I am now a Amazon affiliate associate, which means no extra cost to you, if you want the item, hit the link, then get a few % commission. Bonus, I love crafting & cooking.

I wish I could find you this tupperware 2 ended fork. I used this green fork in the recipe that’s from my mom’s vintage tupperware collection she handed down. Very handy, the handle.

Now that we have everything we need to get started. Here’s the Recipe.

  • 1 pkg Puff pastry (refrigerated)
  • 1 egg (plus 1 tb water)
  • 1 8oz reg. Cream cheese (room temp)
  • 1/2 cup White sugar
  • 1/2 Pure vanilla extract or paste

Directions:

Preheat the oven to 400 degrees. Let get started on the cheese filling. Grab a small mixing bowl and your room temperatured cream cheese and mix your sugar and extract till creamy. Now you can get out your puff pastry and roll it out onto your pan.

Grab your egg and crack it into a small bowl with a tablespoon of water. Beat together then with pastry brush, brush the edges of dough to seal when you fold over to form the edge of crust. You also can brush the top of the crust and sprinkle with a little sugar to help brown.

With your cake spatula, drop cheese mixture over dough to help spread evenly to the edges. Now, you can place your berries on top of the cheese mixture. I put my raspberries in rows as evenly as possible. The berry tart reminded me of the flag, so I threw in some blueberries in the corner. The design is definitely up to you. If your berries are extra juicy, you might want to mix a tablespoon of flour and a tablespoon of sugar together to sprinkle over the berries before baking.

This big danish will take about 20 minutes to bake. Depending on your oven, it might take five minutes more for a golden brown. Tip – if you like the bottom crust crisper, place on the lower rack in oven.

Once the tart is done, pull it out of the oven and cool for 10 minutes. Then, set the pan next to the cooling rack and slide the silicone mat onto the rack and cool for a few more minutes. *You can take a spatula to help you slide the pastry off the mat to the cooling rack.

It’s time to make the Glaze drizzle recipe

  • 1/2 Powder sugar
  • 1/4 Pure almond extract
  • 1 to 2 teaspoons of water

Just mix these three ingredients up to get your glaze ready. You might have to add a little more or less of sugar or water to get the consistency you need. Drizzle glaze over tart. Let pastry completely cool before serving.

This One Big Danish can serve around 12 people a big slice. For a bigger crowd, you can easily cut into smaller slices. It’s perfect for a sunday brunch or a special occasion. I hope you enjoyed this fast, easy recipe. If you have any questions, please comment below, and I will be more than happy to answer them.

Easy Raspberry Shortbread Thumbprint Cookies


Writer by: Michelle R Dunlap


Affiliate Amazon Disclosure

Affiliate Disclosure – Designer Crafts by Michelle is a participant in the Amazon Services LLC Associates Program, an affiliate advertising program designed to provide a means for sites to earn advertising fees by advertising and linking to amazon.com. As Amazon Associate, we earn from qualifying purchases. These affiliate links do not increase the final prices of the actual product or services that you purchased. At Designer Crafts by Michelle, our editors only review products and services that are trustworthy and believe can bring benefit to you. Thus, we do not take extra compensation for product reviews. We greatly appreciate it when you choose to use our links to buy products and we aim to be upfront about the products we receive compensation for! From time to time we also publish advertorials (paid-for editorial content) and sponsored content on the site. When this is the case the content is clearly marked as sponsored or promoted.

This simple 6 ingredient cookie recipe always ranks top of everyone’s favorite. It’s perfectly balanced like butter and jam on a biscuit. I prefer using raspberry jam since it tends to be tart which help balance out the sweet.

These Raspberry Shortbread Thumbprint cookies take few ingredients in this recipe, and bonus, they are easy to make. This is one cookie you can’t find easily at the store, so it’s definitely a specialty cookie. My family looks forward to these delicious cookies at Christmas time every year. I make other thumbprint flavors, but the raspberry is the most requested. Great for the holidays.


Here is a quick video to watch to give you an idea on the steps and techniques in this recipe.

For the Easy Raspberry Shortbread Thumbprint cookie recipe, you will need these ingredients: (makes around 3 dzn)


  • 1 cup Butter (softened)
  • 2/3 cup white sugar
  • 1/2 teaspoon pure almond extract
  • 2 cups unbleached flour
  • 1/2 cup raspberry jam

Ingredients for the cookie glaze:

  • 1/2 cup powder sugar
  • 1/8 teaspoon pur almond extract
  • 1 to 2 teaspoon of milk (any %)

To get these cookies ready to make you will need to get out all the ingredients from above, also you will need a big 1/2 sheet size pan, parchment paper, cookie scoop 1 inch ball size, cookie spatula, rubber scraper, measuring cups and spoons, regular sheet pan with cooling rack, and a small bowl with fork. If you need some of my items on my list, I do most of my shopping through Amazon since there so reliable and highly recommend these products below. Just hit the picture for the link.

Directions:

Once you have everything you need, you can place the 1 cup of room temp butter to the mixing bowl and beat until smooth. If you don’t have a mixer, you can beat by hand. Then add your 2/3 cup of white sugar and 1/2 pure almond extract to the mixing bowl, mix on medium speed for just a minute until smooth.

Now you can add your 2 cups of flour to the mixing bowl, then mix on low till just combined. Scrape down bowl and mix for one more second. Place a sheet of plastic wrap down on the counter and dump the cookie dough out onto the plastic. Try to keep the cookie dough in as you fold the plastic over the top, then twist and mold into a ball as good as you can. As you can see, I barely made it work.

The Shortbread cookie dough really needs to chill for 1 hour before you bake. It really helps the dough rest for a tenderness and also helps with it not falling so flat during baking.

Now that your dough is rested and chilled, you can take your 1 inch cookie scoop and scoop dough onto parchment lined sheet pan. Place dough ball in your hand to roll into a circle ball better. Keep several inches of space between cookies on the sheet as you place them on the pan.

This is where the fun comes in with pressing your thumb in the middle of the cookie to create the “thumb” pocket for the jam to sit. kids like to help with this part of the recipe. If You’re making a big batch for gifts and you want your circle indentation to be perfect to hold the jam, you can use the end of a utensil of some sort. I use the wooden handle of my pasta cutter.

BIG STEP: Place cookie dough in the oven at 350 degrees for 7 minutes, then pull them back out of oven to make the indentation to the center of each cookie. Now you can fill with raspberry jam.

Now that the centers are filled with delicious jam, you place the cookies back in the oven for 7 to 8 minutes. They should look pale but golden on edges of the cookie to tell if they are done.

It’s time to let them cool for a second, and then you can place them on a wire rack to get ready for the Glaze topping. Grab a small bowl, fork, 1/2 cup of powder sugar, 1/8 teaspoon of pure almond extract, and 1-2 teaspoons of milk. Mix all ingredients until smooth. Drizzle glaze to get zig zag lines on the cookies. I usually get about 3 dozen cookies for this recipe.

Time to enjoy these delicious Raspberry Thumbprint cookies. If you love them like I do, you can make them as gifts for any occasion or gifts for the holidays. The best part about these cookies is that you can make them ahead of time and freeze them. I had mine in the freezer for over a month, and they were still delicious! I hope you enjoy this recipe, and if you have any questions, I’ll answer in the comments below. Thanks you.

Leave a comment

Favorite Dishes Made Easier With These Kitchen Items


Blog Writer: Michelle R Dunlap


Affiliate Disclosure

Affiliate Disclosure – Designer Crafts by Michelle is a participant in the Amazon Services LLC Associates Program, an affiliate advertising program designed to provide a means for sites to earn advertising fees by advertising and linking to amazon.com. As Amazon Associate, we earn from qualifying purchases. These affiliate links do not increase the final prices of the actual product or services that you purchased. At Designer Crafts by Michelle, our editors only review products and services that are trustworthy and believe can bring benefit to you. Thus, we do not take extra compensation for product reviews. We greatly appreciate it when you choose to use our links to buy products and we aim to be upfront about the products we receive compensation for! From time to time we also publish advertorials (paid-for editorial content) and sponsored content on the site. When this is the case the content is clearly marked as sponsored or promoted.

Every kitchen needs certain items to run smoothly. Let me share with you all the kitchen items that helped me and my recipes go a little easier.

I”ve had the joy of cooking and entertaining for every occasion for over twenty years now. In that experience, I’ve found what works in the kitchen and what doesn’t. I personally own all these kitchen items listed, and I found they sure make my recipes go a little easier in the kitchen for all my meals and occasions.

It starts out with the right roasting pan in the kitchen.

No matter what occasion, the main course is always the center focus, especially when you use the All-Clad roasting pan for your main dish. This is the one meal you hope to get right the first time when it comes to a big roast. I never wanted to spend the money thinking a pan wouldn’t make much of a difference, boy, I was wrong. When I had used thin metal roasting pans in the past, I noticed the roast would cook too fast and tend to burn.

With this All-Clad heavy-duty roasting pan, the roast cooks evenly to a golden brown. Once you have your seasoned roast, it’s time to let the All-Clad roasting pan cook for you. I also only use stainless steel pan for easy stove top deglazing pan juices for the best gravies. You can not deglaze using a cheap pan. For me, the All-Clad Pan has been easy to clean, and I have had it for years. This roasting pan has become a kitchen must have in my home using it every week for Sunday dinners and for holiday get-togethers every year.

When it comes to any meat dish, you want to make sure it is cooked to perfection and safe to eat.

When you’re entertaining, there’s nothing worse than getting ready to put a roast in the oven, and you can’t remember where the meat temperature gauge is. I have owned more than several, even the digital countertop gauges, and for some reason, they always came up missing. Good old Amazon led me to find a handy digital temperature gauge that is easy to clean. It has a magnet on back to store on the side of my microwave, which is so handy, I never miss place that kitchen item.

This chef‘s knife is made of durable 48 layers of damast steel that slices and dices anything in its way.

Hit Affiliate link above

A Miyabi Kaizen Chef’s knife is an item in the kitchen I highly recommend for any day. Having a curved tip on the blade helps to guide my even cuts with a rocking motion, which it makes it much smoother, faster, and looking professional. Every kitchen should have one good sharp knife. I have had my Miyabi Kaizen Chef’s knife for years now, and it’s still sharper than ever. As you see below, I keep the knife in its own case just for mom to use.

For a large roast, carving forks is a must to help keep steady when slicing

Hit Affiliate link above

The beautiful roast is done, but I only have a spatula and tongs. How am I going to get the big roast out on the platter without burning myself or dropping it? Well, my husband found out and just used his hands to throw it on the platter, but that’s not always handy. We we were young then and had learned our lesson, that’s for sure. This kitchen item definitely helps when you need to move and carve a roast.

Every kitchen should have a set of glass bowls with lids for easy store, heat, and reuse

Hit Affiliate link above

With all the mixing, chopping, and stirring that goes on in the kitchen, I know having my glass Pyrex mixing bowls with the lids makes things easier in the kitchen. For me, to mix, heat, or store my dishes in glass, I feel good knowing it’s safer for my family than pastic. Plus, glass lasts longer, and I love I can easily reheat my dishes right out of the fridge. These mixing bowls are a kitchen item must for everyday meals and definitely needed for the holidays. I’ve had mine for about 6 years and use them for everything.

The KitchenAid mixer does it all for you! It’s really easy to use for so many recipes

The Kitchen Aid mixer has been a staple in our kitchens for many years to help us with our delicious creations. I have had the Professional 6-quart KitchenAid mixer for over 14 years now, and after all the double batch abuse, my mixer is still going strong. It has helped me with all my tasty recipes in the kitchen. With a few attachments, I made my own pasta, whipped up cakes and frostings, cream pies, and definitely made up batches of batches of cookies. It’s especially useful when it comes to the holidays needing extra batches of treats. The KitchenAid comes with a recipe book & video to help you along.

I definitely recommend the stainless measuring cups and spoons as an item every kitchen needs.

Hit Affiliate link above

With everyday meals and special occasions, we enjoy all the herbs and spices that come with our delicious dishes. That’s why a kitchen can’t be complete without a good set of measuring cups and spoons to keep all our measurements just right. This set is easy to keep clean being made of stainless steel. I had my sets have lasted over 17 years now!

I am so grateful I have been able to have all these delicious dishes over the years, building those memories in the kitchen with my family. I hope I have helped you with your future dishes and made recipes easier in the kitchen with these items.

Diy Pumpkin Pillows Fifty Shades of Grey

Author by: Michelle R Dunlap


You can never have enough of Pumpkin Pillows to comfort you in the fall!

When I was younger, my aunt had made my family a whole fabric coronacopia that had little sewn fabric guards, corn, leaves, and, of course, the little orange pumpkin. Over the years, we had kept the little pumpkin out to go with our white fabric pumpkin that was a gift. I started seeing online how these fabric pumpkins were made, and I thought I would give it a try.

  • STEP 1 – Gather all the materials you need to make the fabric pumpkins like ** scissors, hot glue, gorilla glue, 1 yard of fabric, wine corks, heavy thread & needle, pen, twine string, rope, and ribbon trim.
  • STEP 2 – On the backside of the fabric, trace a 12 in circle, then cut it out. For the big pumpkin, cut out a 24 inch circle
  • STEP 3 – Tread needle with heavy tread so it doesn’t snap when pulling tight. Start the knot on the inside of the fabric, then weave needle in & out all around the circle while pulling in thread to gather. As you’re pulling your thread, you can start by adding your cotton stuffing. Then, when you get your pumpkin stuffed, tie it off.
  • STEP 4 – For the smaller pumpkins, I use the smaller string and the bigger pumpkins the big rope. I start with the bottom side of the pumpkin to wrap the twine string around pumpkin tight. Then I went around again, and then I crossed over to the top, and then I tied it off.
  • STEP 5 – Add the Wine Cork of your liking to the middle, I like to put gorilla glue in the hole, then add cork. I keep cork steady with hot glue so I can add a bow around bottom of the cork & add ribbon trim too.

It was only fitting that I called my big fabric pumpkin “The Fifty Shades of Grey Pumpkin” with the wine cork I had in my collection. These pumpkin pillows are fun to toss around the couch while looking fall festive. Glad to share with you, please like & share

Design a site like this with WordPress.com
Get started